Thanks so much for stopping by and visiting. Hope you find something to make your creativity bloom!

Tuesday, March 30, 2010

Sketchy Thursdays

Here is this week's sketch from the Sketchy Thursday gals-- I really liked this one, simple but so much potential!


And here is my Easter layout using this sketch:


I used Basic Grey's Nook & Pantry collection-- yummy! No, not the names even they the papers are called things like Lemon Meringue pie and Fruit Salad! But yummy colors and patterns, pretty pastels that still have a little kick mixed with brown. Love it! This is actually only one side of a two page layout, since I always make two page layouts, but it is also part of my Beary Scrap post for tomorrow so check back tomorrow and you can see the whole thing!

Thursday, March 25, 2010

Happy Birthday at the Beary Scrap!

Visit the Beary Scrap Design Team Blog to view all our Birthday ideas this week and check out my own post below.


Happy Birthday to You! Happy Birthday to You! Happy Birthday -- oh no! I don't have anything to wrap your present in. . . .

Don't you hate it when you are in a hurry to get to some birthday event and you rush to your supply of gift bags and wrap to find that you only have a bag for a New Baby or a purple bag when you are headed to celebrate a birthday for a boy? I don't know about you, but this happens to me quite often. Lately I have taken to just stocking up on plain colored bags and then making a card specifically for that person that matches the bag-- I am a little OCD about things matching! But take the time to whip up a couple of these sets of matching tags, bags and cards and you will be set for anyone's birthday-- male, female, child or adult.

My project this week is a matching bag, tag and card made using Bazzill In Stich'z Surprise Party stitching templates (which are on sale!) and floss. I have never really handstitched much, either on cloth or paper, so this was a totally new experience for me. It was so fun! I used a paper piercer and the template to punch holes in my Bazzill cardstock-- I used a light brown and was really pleased with the results, it matched my Kraft colored bag nicely (remember how I like that matching stuff!) Then I sat and stitched while watching Dancing with the Stars on Monday night (one of my favs-- who do you think is going to win Season 10? I don't know quite who I am rooting for yet!) and just had a great time. It was so easy! Pretty soon, I was mixing the designs together (ie the balloons are empty in the middle on the template, but I added some more squiggles over the top) and even free-stitched a little of my own such as the stripes on the candle. The next day even my kids were like "Wow, Mom, you did that?" Pretty impressive, I know. :) These templates are great-- I have already got my eye on the 8x8 flower template I want to get next!
Then I just mounted my stitched accents by machine stitching them to some Bo Bunny Popsicle papers, (Banana Split, Fruit Punch and Juicy Orange) then onto white which is distressed with Tim Holtz Broken China ink. The orange patterned paper on the bag was punched with a border punch and I used random ribbons from my stash for the handle of the bag. I used the Popsicle Combo Cardstock stickers to add "Birthday" to my stitching to give it some variety and then some Bo Bunny Buttons & Bling Popsicle buttons to finish it off.
I really love these Bo Bunny Popsicle papers-- the colors are so bright and fun they could be used for a great variety of projects-- birthday, sports, boys or girls, family gatherings, summer days, parties, carnivals, etc. Here is a Summer layout I made earlier with these cute papers-- I cut around the waves and added Stickles to the edge for glimmer.

Thursday, March 18, 2010

It's SPRING at The Beary Scrap so take a look at my post for the week and then head on over to our Design Team blog to see the awesome projects the other gals have created this week

"Spring is when you feel like whistling, even with a shoe full of slush" (Doug Larson)-- isn't this so true? As I was making my project for this week's post, it was a BEAUTIFUL day outside-- sunny and 60 degrees with the meadowlarks chirping and my kids out riding their bikes. And yet, my deck is still covered with snow and the weatherman predicts more snow/slush for this Friday! Aah, it's spring in my part of the country-- Idaho -- where every other minute is a different type of weather. I'm sure spring fever is hitting other parts of the country too and what better thing to do when the weather starts to turn than a little spring cleaning. My project this week may help you get motivated to take on those Spring projects.

My project this week is a super cute to-do notebook that you can whip up in no time at all. And who knows?? If you have something fun to keep track of your lists and projects, you might actually try to get those lists done. Plus, if your house is like mine and notebooks often disappear from my desk/purse/office and come back full of all types of doodles and drawings, maybe this notebook will be so obviously "Mom's" that nobody will take it from you. (At least I know my husband won't be taking it, too flowery and cutesy for him!) In any case, get yourself a nice, new notebook that is just for you (this one is just from WalMart) and cover and embellish to your heart's content!

My notebook is covered with Basic Grey Sugar Rush (on sale this week!) -- I love the fun, bright colors in this collection. I used Peanut Brittle for the front cover and one of the pockets, Candy Hearts for another pocket and the green back side of Candy Hearts for the back cover. I distressed all the papers with Tim Holtz distressing ink in Peeled Paint. Then I raided my ribbon scraps and tied a bunch of matching ribbons through the spiral binding. I added a couple of journaling cards to the front and used rub-on letters for the title "To Do." A few Prima flowers completes the front. (Check out the My Mind's Eye rub on alphabets on sale!)


Inside I used more paper just to cover the front of the pockets (handy for slipping in notes, appointments, receipts, etc. but they can still look cute!) and added rub-on titles there too. All finished in no time.


So celebrate Spring this week, no matter where you live, and treat yourself to your very own cute "To Do" notebook and then go tackle those Spring Cleaning projects. Happy Spring everyone! And be sure to check back tomorrow for more Spring inspiration to keep that Spring Fever high!

Wednesday, March 17, 2010

Sketchy Thursdays

So I just discovered (well, within the last week) the coolest sketch blog-- Sketchy Thursdays. Every Thursday they post a sketch along with some inspiration from their Design Team. I love starting with a sketch, it makes designing so much quicker but still leaves tons of room for my own creativity. Here is their sketch for this week:


And here is my layout using the sketch:


I think it turned out pretty good! How can it miss with such a cute kid? He's all innoncence on the outside but you should hear the real story! Ha-ha :) I made this layout using mostly stuff from my brand new Express the Moment kit that I picked up TODAY! Everything was so cute I couldn't wait to break it out. Check out more of Kim's cute kits on her website and go try a sketch at Sketchy Thursdays.

Thursday, March 11, 2010

Lucky to Have You!

Happy Thursday everyone! Welcome to my Week 2 Beary Scrap Design Team Post. After you view my layout, be sure to hope over to our Design Team blog to see all of the great Luck O' the Irish creations this week!!

Do you believe in luck? Fate? Coincidence? None of the above? Well, I don't know for sure about all of those but I do know that I am truly LUCKY to have three beautiful children (I may be a bit biased-- sorry!) and that was the inspiration for my layout this week. And I know all of you have someone (kids, friends, spouse, pets, parents, etc) that you feel truly LUCKY and blessed to have so what better time to document that relationship than now!


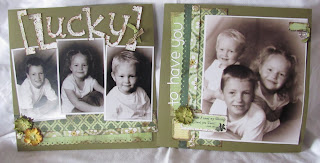
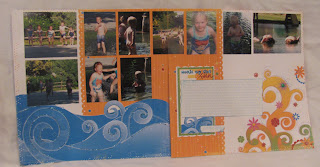
This layout starts with (of course) Bazzill Palo Verde cardstock. Then I added varying pieces of 3 different papers from the Basic Grey Origins line-- Mineral Soak, Brown Sugar Scrub and Seaweed Wrap, don't those names sound wonderful? So relaxing, makes me feel like a trip to the spa! Two of the strips I punched with a border punch and then inked all of them with Tim Holtz Vintage Photo ink before adhering and adding some random brads. The title is also cut from the Orgins line, Hot Stone, and was cut on my Cricut with the Cuttin' Up cartridge. I added Stickles in Cinnamon to the edge of the title to give it a little sparkle. If you have never tried Stickles, you've got to get some-- some being the key because once you've tried one, you'll want to collect all the awesome colors! They are so fun and easy, you've gotta try 'em!
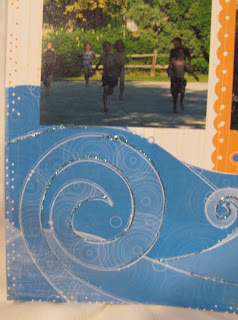


I used the Writers Block Journaling set from Basic Grey Origins to embellish the right hand side of the layout. The Writers Block is one of the cutest embellishments I have seen in a long time-- it comes with a mini memo pad you can adhere straight to your page and then journal inside, 2 sticky note pads (10 sheets each) and 2 diecut stacks (10 each). I used the large diecut and both sticky note pads on this layout and I was really pleased with the look, plus I still have so much more from that set to use on other projects. Last I added just a few Petaloo flowers, some pearl accents, a spiral clip and some random ribbon. I hope you like my LUCKY layout and that you take some time in the near future to make a layout about someone you love and how lucky you feel to have them in your life!


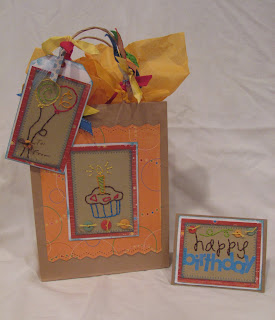
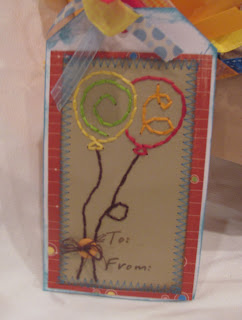
And if you don't want to make a whole layout but would rather give that person a treat instead to show them how you feel, here's a quick idea for you: Take an empty flower jar (check out these Prima containers), decorate with paper and ribbons and fill with candy. Instant handmade treat anyone would feel LUCKY to get!


Make sure to check back tomorrow as the Luck O' the Irish continues and see what else our Design team has for you!

Thursday, March 4, 2010

Beary Scrap Design Team Week 1

Hey out there! It's Thursday and that means it's my day to share at the Beary Scrap Design Team blog. Our theme this week is "Celebrate" so check out my layout below and then head on over to out DT blog to see more of the other gals' great ideas for those Celebrations in your life!


I found this quote on Celebrating recently and wanted to share it with you "Stop worrying about the potholes...celebrate the journey!" (Fitzhugh Mullan). Life truly is a journey and we should definitely celebrate every single day-- and there is no better day to celebrate than a Wedding Day! And so my 2 page layout celebrates the wedding of my brother-in-law and new sister-in-law.

My background cardstock is from Bazzill (Bazzill is my absolute favorite!! So many colors!)-- it is Spring Breeze.
The patterned papers are from Doodlebug's Sugar Plum collection.
I loved the colors of the Sugar Plum collection and they matched perfectly with the colors of the wedding however the patterns can be a bit overwhelming so I cut them down and used just a bit of the patterned paper to bring out those pretty colors. All the paper, both CS & patterned paper are inked with a brown distressing ink, one of my favorite's is Chalk Box Chestnut. Eyelet lace from my stash goes over the patterned paper and is held with brads from that same Sugar Plum Collection. More brads (love the butterfly brads!) and stickers from the same collection embellish the rest of the page. I used brown rubons to add part of the title and cut the word "Celebrate" on my Cricut (Jasmine cartridge). The last embellishment I added were my own flowers.

To make the eyelet flowers, use a needle and floss and take a running stitch through one edge of the eyelet. Pull tight and tie off and wa-la, a flower! Add a brad or other embellishment to the center. The paper flowers were a bit trickier but still not too hard. I used a lightweight patterened paper, Aleene's tacky glue adhesive and some Prima flowers along with more Sugar Plum brads. For a quick tutorial and more pics, keep on reading to the next post.


One more thing-- here is a bonus wedding card idea I made with the scraps from my patterned paper and one more handmade flower and sugar plum brad. I used the same stamp for the background and stamped it right onto a plain white Prima flower to make the purple and white patterened flower. Keep those scraps and use them up for making some cute and easy cards!


Hope you liked my Celebration layout and wedding card and that you find something to celebrate TODAY! Don't forget to check the Beary Scrap Design Team Blog tomorrow for some more Beary Scrappy Celebration ideas!

Paper Flower Tutorial

I originally found this idea in the April 2010 issue of Scrapbooks etc. Check out this issue for more directions and other ideas for handmade flowers.


Step 1: Punch out a circle or scallop shape and spray lightly with water


Step 2: Fold in half, gentle not firm creases.


Step 3: Gently fold up like a small fan.

Step 4: Hold tight to the bottom point of your fan and then carefully unfold the flower.


Step 5: Place a dot of a quick dry glue on a scrap paper, press the pinched bottom into the glue and flatten it.


Step 6: When glue is dry (this takes awhile even if you did use quick dry glue), very gently and slowly peel the flower off the scrap paper.


Step 7: Add other flowers and embellishements for the flower center and attach to your attach with several glue dots.