Thanks so much for stopping by and visiting. Hope you find something to make your creativity bloom!

Sunday, May 30, 2010

It's a Bit Sketchy at The Beary Scrap this week


It's Challenge #3 at our Beary Scrap Design Team Blog-- check out this great sketch designed by our DT coordinator Susan Killam. Just create a card or layout based on this sketch and link it with our linky tool on the design team blog page between now and June 15th. One lucky random winner will be chosen to receive a $20.00 gift certificate from The Beary Scrap plus the DT will pick our 3 top favorites! Come join the fun- sketches are a great way to jumpstart your creativity! And be sure to check here or there on Thursday for my take on the sketch! (Hint: mine won't include flowers, what do you think I will be substituting instead????? It's round and orange!)

Thursday, May 27, 2010

Treats for Teachers

Yay!!!!!! Today is the last day of school for my kindergartner and tomorrow for my 3rd grader and, boy, are we excited for summer! No more being tied to the bus schedule, fighting the 3rd grader to do homework and keeping track of all the endless papers that come home from school. Having taught High School for 5 years, I am also well aware that the teachers are just as excited to have this break and well deserve it too! This is a great time to tell those teachers THANK YOU for the impact they have made in our kids lives this year. At The Beary Scrap this week we are celebrating "No More Pencils, No More Books" and have a bunch of school themed projects to inspire you. My project for today is a thank you treat for those hard working teachers-- my own mini version of a "Happy Meal"-- a Diet Coke and a french fry container full of treats.
For detailed instructions on how to make these visit our Beary Scrap Design Team blog and for some great deals on the My Minds' Eye Dreamy paper collection I used, visit The Beary Scrap store. Have a great Memorial Day weekend and play hard now that the final school bell has rung for the summer!

Sunday, May 23, 2010

Meet Boston from The Beary Scrap

Kimm from The Beary Scrap has a brand new tear-bear critter for you! Meet Boston the Kitty, debuting June 1 at her store. Isn't she cute? Check out Boston along with all her other tear-bear critter friends-- which include bears, a dog, elephant, rabbit, chick and reindeer. Plus, others coming soon! And for a chance to win your own Boston acrylic pattern and some awesome mulberry paper, go to The Beary Scrap blog and enter Kimm's blog candy. Good luck!

Thursday, May 20, 2010

A Fancy Folded Forest

When Susan told me the theme for this week, I knew immediately what I wanted to fold! My layout this weeks takes you Into the Woods with some complicated-looking but easy-to-make pine trees that work perfect on a camping, nature or even Christmas layout or card.


To make your trees, cut squares in descending half inch sizes ( 4", 3 1/2 ", 3", 2 1/2" etc.) out of a LIGHTWEIGHT patterened paper-- cardstock or cardstock weight patterned paper will not work as well. Begin by folding your first square directly in half, unfold and fold in half again the opposite direction.


Unfold, you should now have a square with crease lines as shown below-- I have traced over mine with a pen to make sure they show up in the photo.


Now fold you squared diagonally to make a triange; unfold and repeat in the opposite direction.

Now your crease lines should look like this:


Fold the square directly in half again along one of the previous crease lines and then carefully fold both sides in toward the middle to make a triangle that looks like this.


Then you will need to fold in each side of the triangle into the middle to a point like this:


Place a glue dot in the inside of the larger triangle and in the small folded tip to hold it.


Repeat with your other squares, doing as many as you want to make a tree. You can start with squares as large as you want and go up as many layers as desired to get the size of tree right for you. Just experiment and see what you like best. After finishing my triangles I inked all the edges with Tim Holtz Distress Ink in Pine Needles to make it stand out a little more and then adhered the tree, triangle by triangle, to my page. As I went up, I angled each triangle a bit so it didn't look to straight as, of course, no real trees truly are.


To make the page to go with my easy-to-fold evergreen trees, I used a light brown Bazzill cardstock that I trimmed to 10 x 10. I used letter stickers to spell out my titles on the Bazzill and then spritzed around the letters and other edges with Tattered Angels Glimmer Mist in Clover -- this spray is seriously the most gorgeous green color I have ever seen and it's a limited edition so make sure and snatch some up before it's gone! After letting it dry a few minutes, I peeled off the stickers and threw them away, leaving the title behind in the mist. This is a cool way to title your page and a different way to use your letter stickers. Notice my stickers below don't even all match-- I had the same alphabet in several colors and I used them all to make my title since I was out of certain letters in some of the colors.


After letting the cardstock dry thoroughly I machine stitched it onto some Yellowstone National Park patterned paper, adhered all my pine trees and added my pictures. The pictures are all matted with Bo Bunny Double Dot cardstock-- this paper is so nice!! It has amazingly rich colors, the pictures on the website don't really do it justice-- I can't wait to get some more. I finished off my page with some brown polka dot brads from Doodlebug Key Lime collection and pine trees from The Eyelet Outlet.


They're amazing easy and quick, these fancy folded trees so give them a tree. I left mine plain but imagine them embellished with brads or rhinestones to look like a decorated Christmas tree or topped with Snow Tex and glitter to look like newly fallen snow!

Don't forget to try your hand at some fancy folds and enter our Challenge #2 for a chance to win a Scor Pal from The Beary Scrap and be sure to check back tomorrow for some more folded inspiration!

Tuesday, May 18, 2010

Sketchy Thursdays June Guest Designer Challenge

This sketch is for Sketchy Thursdays June Guest Designer Challenge:


Here is my take on the sketch-- I had a lot of fun making the fabric flowers with layers of cotton, tulle and ricrac, I really like how they turned out! This picture was taken the day before Easter when I took my kids to see Great Grandma at her Assisted Living home and there was a huge Easter egg hunt for all the kids. I don't know if the kids or the residents enjoyed it more but we had a great time. My sister was there with her 4 four kids and my cousin with his four so we had a party of sorts in Great Grandma's room after the egg hunt. She enjoyed it the most and that was the whole point!

From one of my favorite blogs, here is Sketchy Thursdays weekly sketch for 5/13:


And here is my take on the sketch-- these pictures are for my Grandma's Family History Scrapbook that my mom, sister and I have been working on for several years. We sort her pictures, scan the old photos and print them out to scrapbook. We are very close to being done!! Only a few more layouts to go. The paper came in my kit from Apron Strings this month and I loved the bright colors! The organza flower is a technique I learned from my lovely friend Susan and fellow The Beary Scrap Design team member-- check out her post from a couple weeks ago to find out how to make these flowers using a candle's flame.

Sunday, May 16, 2010

Susan's Birthday Candy

My lovely friend and fellow Beary Scrap DT has some awesome candy over at her blog in honor of her birthday. So go take a look, wish her a Happy birthday and enter to win some great scrapbook goodies! Make sure you take a look at her projects while you are there, she is amazing.

Tuesday, May 11, 2010

A Boy and His Rocks

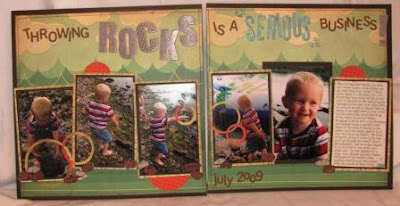
Isn't it funny how the smallest things entertain little kids? This is definitely true with my boys and rocks-- they could throw rocks into the lake at my grandparents' cabin all day and be perfectly happy! I think I need to take a lesson from the them, relax a little bit and have fun just throwing some rocks.

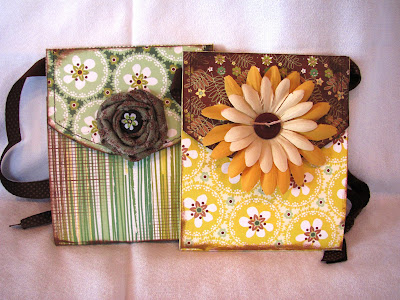
I used the Mr. Campy Collection from Cosmo Cricket for my page this week. I loved the muted colors in these papers and the fun patterns. I got these a couple of weeks ago from the Clearance section at The Beary Scrap. Unfortunately, it looks like they are gone now but make sure to check out the great deals Kimm has there, there are paper lines from lots of companies marked 20%, 35% and even 50% off! Besides Cosmo Cricket, I especially like the papers from Bo Bunny, Scenic Route, and the My Mind's Eye Just Dreamy papers so definitely take a look and scoop up some bargains!


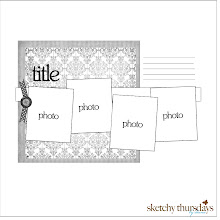
A few tips & tricks I want to point out about my layout:


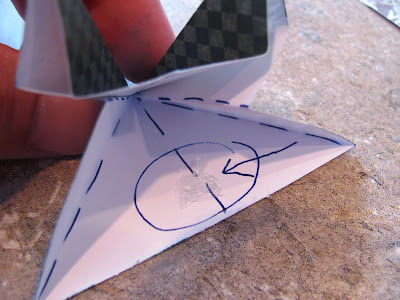
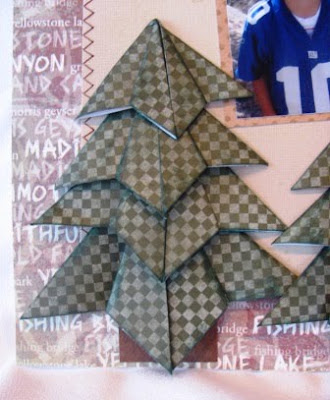
****To highlight the rocks and the movement of my little boy's hand while throwing, I created some circle frames to put right onto the photos. I used various circle punches, punched a circle, put aside the actual punched out paper and then carefully cut around the circle that was left in the sheet of paper to make a thin frame. This could be easily done with squares and ovals as well and is a different way to use your punches.

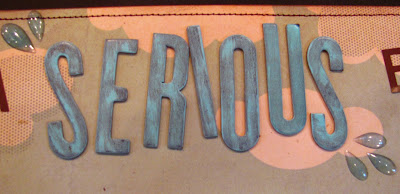
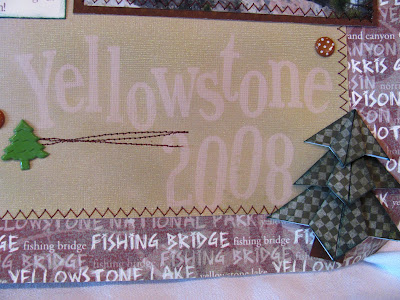
****I didn't have the exact color of aqua letters that really matched the paper, mine were a little bright and so I inked all over them with Tim Holtz Distress Ink in Vintage Photo to tone down the bright color. It takes a bit longer to dry because the letters had a smooth finish but it turned out just the right color. You could also use some paint to do this. So next time you think you don't have the right color of letter stickers, just see what you can do to alter them instead of getting new ones. It's good to use up your stash!

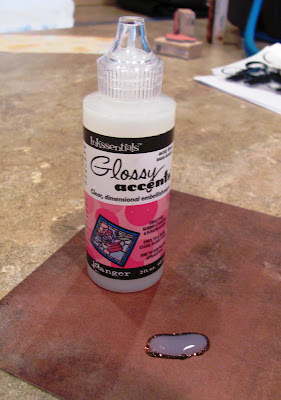
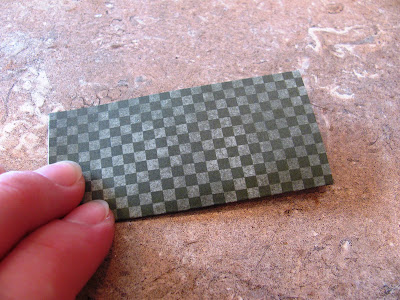
****I decided to make my own rock accents, this was definitely an experiment! I drew a rock shape on a scrap piece of brown paper with Stickles Glitter Glue in Cinnamon and then filled in the inside of the shape with Glossy Accents clear, dimensional adhesive.When it is filled in, it looks like this and it takes quite awhile to dry, I let mine sit about 5 hours before they were truly dry so this is not something you can just throw together for a quick page or card. But the dimensional adhesive is pretty cool and dries to a hard, clear, glossy finish that I was hoping mimicked the surface of a wet rock. My 6 year old daughter knew exactly what is was when I showed her and said "What does this look like?" so I was pretty pleased with the results.

****Lastly, I used Teardrop Rain Drops from Fiskars for the water splashes-- which were not quite as wet as the splashes that hit me while I was taking these pictures.

I hope you have some boys in your life to celebrate this week with either a card or layout-- be sure to check back tomorrow for more STICKS & STONES ideas! Don't forget to check out all the great bargains at The Beary Scrap in honor of National Scrapbooking Day (May 1) and our brand new challenge which will be posted first thing on the 17th!!

Wednesday, May 5, 2010

May Flowers at The Beary Scrap

While I wake up to snow here in Idaho, flowers are blooming all over our Design Team blog at The Beary Scrap. My flower project for this week is these quick and easy purse notepads decorated with a handmade fabric flower (or whatever flower you might have). Check out my post today at The Beary Scrap Design Team for detailed instructions on how to make the purse and the fabric flower as well.


While you are visiting our blog, check out our new Beary Sweet Challenges-- Challenge #1 is to create a new project using flowers. Enter your project by linking it up to our blog by May 14th, 11:59 pm EST for a chance to win a $20.00 gift certificate to The Beary Scrap-- yeah! What's better than free scrapbook goodies! The Design Team will also be picking our favorite top 3 -- look for all the winners to be posted on May 17th. Happy Flowers!