Thanks so much for stopping by and visiting. Hope you find something to make your creativity bloom!

Saturday, December 10, 2011

Exciting News!!!

I am so excited to announce that I have been chosen for a new Design Team-- Friendship's Garden Challenge Blog, check it out here then like or friend them on Facebook to get involved in all their great challenges. I am so excited to be a part of this community of great designers and to get to know more people through the challenges they offer.

Their current challenge is a Christmas challenge with a photo from Pinterest for inspiration, check out all the details here or go to this link to view this cool tutorial from Garden Girl Cheryl Ann on how to make cards or tags using adhesive metal sheets. (like those below)


And you can look for my new projects as a Garden Girl starting after the first of the year. Yippee!!!!!!!!!!!!

Tuesday, November 29, 2011

November Birthdays

Happy Birthday to you! You're a hundred and two-- okay, just kidding, but that's how my kids sing it. I think they think I'm old! Oh well! My card today is a cute, cute birthday card for a cute, cute girl! My niece Devri turned ONE earlier this month and this is the card we sent her:


I love this little owl, he's so fun! And it matched the birthday paper perfectly. I have to show you the inside too, though I didn't really do much to the inside except for print out this big picture of Dev; babies always like to look at themselves in mirrors so I thought she would like her face inside the card, isn't she adorable?


Friday, November 25, 2011

A Beary Sad Day

If you have been reading The Beary Scrap Design Team blog this week, you know that we are discontinuing our Design Team and that each of us has taken a day this week to say goodbye (what an awful word!) I have been dreading this day for awhile and it still makes me a little teary to think of the end of our DT. I love all my fellow DT ladies and will miss them dearly! These wonderful ladies have inspired me, encouraged me, made me laugh and truly blessed my life! You can view my full, sappy post here.


My Design Team farewell project had to be a Tear Bear and so I created this Thank You card as a tribute to all the Beary Scrap followers out there who kept us going so long, thank you!


I will miss the Design Team but Kimm's store is still open so be sure to check out her great prices!

Thursday, November 17, 2011

Almost Time for a Countdown!

The Holidays are fast approaching and I have one more project for you today to help you with your Christmas preparations! If your house is like mine, counting down to the big day is a BIG DEAL, with the excitement of the little guys growing each day as they eagerly anticipate Santa Claus and all the other fun stuff that comes with Christmas. My project today is a quick and easy way for your family to count down, plus a cute decoration to put up in your house!


I used the gorgeous new Christmas papers from My Mind's Eye Lost & Found line to create a countdown clipboard. I bought a wood clipboard from the dollar store (love the dollar store!) and covered it with one of the papers, using glue stick to adhere it to the wood. (two coats, one on the back on the paper, one on the front of the clipboard). Then I added a bunch of fun ribbons across the top, including some lace, seam binding and a jingle bell. The numbers and "days until Christmas" I printed off my computer and cut to the right size. If you would like to make a similar clipboard for your home, I've listed the dimensions below to help you!


Dimensions:
Paper for clipboard base -- 8 3/4 inches wide x 10 1/2 inches long (round corners)
Numbers -- 5 inches wide x 7 inches long (printed two to a page and then round corners)
"days until Christmas"-- 7 1/2 inches wide x 2 3/4 inches long (round corners)
Mat for "days until Christmas"-- 7 3/4 inches wide x 3 inches long (round corners)


I hope this helps you in your holiday planning! Keep those Beary Best projects coming for our month long challenge over at The Beary Scrap, we are loving seeing all your talented work!

Thanksgiving Challenge at Friendship's Garden

Today I am so excited to share with you a card I made as a Guest Designer at Friendship's Garden. This is a new challenge blog for cards, tags and altered projects that I am so excited about! The DT ladies are fabulous and besides their beautiful projects, leave such nice comments! The focus of their challenges is to use something BESIDES a stamped image and I love this! I am in awe of the beautifully stamped and colored images I see all over blogland but that is just not me and let me tell you, this challenge blog is me! I love it!

So when they asked me to be a Guest Designer after I entered a challenge I was so excited and honored to do it. The challenge for this week is THANKSGIVING and the project recipe is: 1 Die cut, 2 patterned papers and 3 trims. This challenge is running for the next two weeks so take time to check out this new blog and enter your project.

Here is my Thanksgiving themed card:


Thanks for looking!

Friday, November 11, 2011

Week 2 of "Our Beary Best"

My project this week at The Beary Scrap is a couple of quick and easy Christmas decorations featuring these awesome Christmas papers. I completely adore the color combination in these papers-- traditional red and green but dark paired with BROWN (I love BROWN!) and just a tiny bit of grey. So pretty! I am in a red/green/brown mode this week as I prepare for my Christmas craft shows and I have been painting and embellishing everything in these colors, including both of these:

First is a set of stars, about 4 x 4 inches painted, sanded, varnished and then a little bit of paper added before my vinyl words.


Next is a set of JOY letters, about 12 inches tall, also painted, sanded and varnished then decorated. I added my Echo Park paper to the J by tracing and cutting it out then putting it on with a heavy layer of glue stick (one layer on the paper, one layer on the wood). I glittered up my O using tacky glue and some glitter.

I hope I passed a little of my holiday mood along to you-- we'd love to see what you are creating so hop on over to The Beary Scrap Design Team blog and enter your projects (more than one, if you want!) in our month long challenge for your chance to win a $30 voucher to The Beary Scrap store.

Thursday, November 10, 2011

Card under 15 minutes!

Have you ever timed yourself making a card? I found the funnest (is that a word?) challenge over at a new challenge blog called Friendship's Garden (love, love, love this blog--- more details on that coming next week!) The challenge was to make a card in 15 minutes of less and I thought, that's easy, I can do that, no problem!

Well, it wasn't as easy as I thought because I started my timer and before I knew it, it was already up to 8 minutes and I was just starting! I had to hurry! This was such a fun challenge and really stretched me. Here is my official timer (yah, I just barely made it!)


And here is my card:


This card is based on this sketch from Card Patterns:


Definitely check out Friendship's Garden and see if you can make a card in 15 minutes or less!

Friday, November 4, 2011

Grateful

November is such a lovely month-- the beginning of the holiday season, a time for excitement, family and to remember to be thankful for all the wonderful things we have (as we celebrate Thanksgiving here in the United States). It's the perfect month, then, for the great challenge we have going on now at The Beary Scrap. We know your holidays get busy so we have made it easy peasy with an Anything Goes challenge called show us "Your Beary Best." This challenge goes ALL MONTH LONG, you can enter as many times as you like and the winner will get a $30.00 voucher to The Beary Scrap Boutique. We have lots of great projects entered so far and we'd love to see even more!

My project for this week is a Gratitude Journal:


I started with this Thanksgiving quote that I absolutely love and altered a composition notebook using papers from SEI's Oasis line-- these are perfect for fall and Thanksgiving theme projects with pretty fall colors and foil accents.


This journal could be used just by one person to record all the things they are grateful for or it could be used at the Thanksgiving table and sent around so that different family members had a chance to write down their thoughts, creating a family keepsake.


Keep those "Beary Best" projects coming all November long! I love visiting your blogs and seeing all of your fantastic work-- I am grateful for you!

Friday, October 28, 2011

Happy Halloween!

Fillet of a fenny snake,
In the caldron boil and bake;
Eye of newt, and toe of frog,
Wool of bat, and tongue of dog,
Adder's fork, and blind-worm's sting,
Lizard's leg, and owlet's wing,—
For a charm of powerful trouble,
Like a hell-broth boil and bubble.

Double, double toil and trouble;
Fire burn, and caldron bubble.

MacBeth Act IV Scene 1


Here I am with my second Double or Nothing post for The Beary Scrap and this week is dedicated to our DT leader Susan (and a guy named William!)-- who inspired me early this week by saying she was waiting to see a Double, Double Toil and Trouble project! I guess I haven't had enough of Halloween because that got me in the mood for a little Shakespeare (I do have an English minor!) and a double dose of Tear Bear Witches.


And so my Double or Nothing project this week is a DOUBLE pair of Halloween birthday days with DOUBLE Tear Bear Witches to wish my two nieces a DOUBLE Halloween birthday! (Yes it's true, these two sisters, turning 8 and 5 this year, share that spooky day a birthday. If you read my Halloween post last year, you might know who else shares that day with them! Hint: There's a reason I like Halloween so much!)


Here's a look at the front of my Halloween birthday cards, the Tear Bears are decorated with all kinds of cute Halloween stickers and bling.

A closeup of one of the cards:

Here they are standing up:
And a look at the inside:
So, did you figure it out? Yep, it's my birthday too today! We are a whole freaky family of witches. And what I would love the most for my birthday is for YOU to enter our Double or Nothing challenge so I can visit your blogs and get inspired by your talented projects, so be sure to link up your project by 11:59 EST on Halloween night for your chance to win!

Friday, October 21, 2011

Spooky Double or Nothing at The Beary Scrap

We have a brand new challenge at The Beary Scrap-- it's Double or Nothing-- to use two of something on your project. I had so much fun making my Double or Nothing project for this week and can't wait to show you what I came up with:


I got this little wood coffin at my local craft store (it's about 6 inches tall and two inches deep) and couldn't wait to decorate it up. First I painted the whole thing black; for two reasons, first so I didn't have to cover every tiny surface with paper, and second, so that no wood would show between the edges of the paper.


Then I measured or traced each surface and cut some paper to fit from Authentique's fantastic Glowing papers.

After covering the coffin with my TWO designer papers, I went to work embellishing it (oh, the most fun part!) with TWO types of trim (black tulle and seam binding) , two vintage Halloween potion tags (digi images bought off etsy), TWO black candy dots and TWO sparkly spiders.

But wait, I still have one more DOUBLE on my project, it's also a DOUBLE treat-- a cute coffin and then inside--


an extra goodie! I filled my coffin with some Halloween candy and this cute little mummy. I actually was thinking of putting a creepy skeleton inside but I've been making lots of these candy mummies and my daughter insisted this was perfect for putting into the coffin.


This one is a mini version made from a package of Tic Tacs (though I have been using full size Hershey bars for my other ones). Simply rip some strips of muslin fabric, glue around the candy, add two eyes and a sentiment (or any other decoration; I wanted to add a spider but then that would be 3 spiders and ruin my doubles! Hee hee).

I am entering this project in the following challenges:


I hope you have enjoyed our first week of Double or Nothing projects and are inspired to make one of your own. WE LOVE SEEING YOUR CREATIONS AND VISITING YOUR BLOGS so be sure to enter our current Beary Sweet Challenge by clicking HERE; you just might win a Beary Sweet voucher!

Friday, October 14, 2011

A Sketch, some Journaling and some Challenges!

Happy Friday to all you fabulous paper crafters out there! Here is a teeny peek at my second Free for Fall project for our current Beary Scrap Challenge:


For a long time I have been wanting to make a layout with the chorus from a Trace Adkins song that I absolutely love-- it makes me tear up (yes, I'm a sappy dork!) every time I hear it, which is usually in my car full of 3 busy kids as I'm driving them from one activity to the next and the words really hit home for me:

You're gonna miss this
You're gonna want this back
You're gonna wish these days hadn't gone by so fast
These are some good times
So take a good look around
You may not know it now
But you're gonna miss this

And so I finally decided this was the week and I made my layout on this song and our crazy busy life. Here is my two page layout, with pictures of kids' various activities this week.


A closer look at page 1, this page has the song lyrics down the right hand side along with a picture I took in my car looking at my kids in the rear view mirrow-- I saw this idea somewhere in a scrapbook magazine once and thought what a cool picture, as I so often see my kids that way as I peek in the mirror to see what chaos may be happening in the back seat!


The first page is based on this great sketch from Sketchy Thursdays where the challenge was to "get your journal on" which I love because I love to write and believe journaling is so important for scrapbooking!


And then I had to expand to a second page because I hardly ever do one page layouts! Plus then I can just have even more journaling! Here is the second page, down the left hand side of this page is a list of all the things our days currently include (like school, homework, swim team, football practice, piano lessons, etc) and my feelings about the craziness:


Thanks for letting me share this layout with you, even if it's a little bit sappy!And if you have a project to share you have one more day to enter to our Free for Fall (0r Anything Goes!) challenge so link up your project by clicking here for your chance to win!

Friday, October 7, 2011

Free for F'All at The Beary Scrap

We have an awesome challenge going on right now over at The Beary Scrap, Free for F'All or Anything goes! There have been a lot of awesome entries so far so if you want a chance to win a $20 voucher to The Beary Scrap store, hop on over and link up your project!

My project for this week is a quick paper pumpkin you can make as seasonal decor or to use as table favors for a fall occasion. All you need is a scallop circle punch and some great fall paper!


If you want to try out this little pumpkin for yourself, follow these steps:

1. From your patterned fall paper (you could use Halloween papers for a spooky pumpkin!), punch 8 scalloped circles. My punch was 3 inches but you could do smaller or larger depending on what you have or cut them out with a die cut machine.


2. Ink the edges of your scallop circles and then carefully line them up exactly and fold them in half.


3. After they are folded and even, unfold them and cut off the bottom scalloped edges to make a straight edge. The straight edge needs to be the same on all of the circles so measure carefully. (I had a little bit of a hard time getting them even, so don't get frustrated if the first try doesn't work out perfect! Just try again!)


4. Begin attaching the circles to each other, one at time so all the scallops match up (as close as possible) and the flat edges are all together on the bottom. You may have to fold a little more and adjust as you go to get everything matched up. You also may have to trim a little off the bottom to make the pumpkin stand straight if not all your straight edges lined up. You should end up with a shape that looks like this:


5. Embellish however you want! I broke a branch off a tree in my yard for a stem and worked it through the center of the pumpkin. You could also use some wire, fabric or just more paper for a stem. Add leaves, curled up wire or anything else you like! I spritzed some seam binding with Glimmer Mist and used that for my leaves.

Happy Crafting this weekend and remember to enter your project in our current challenge!

Thursday, October 6, 2011

Birthday Cards

It seems like I can never have enough birthday cards-- not for me or for the places I sell them! Here is a fun birthday card I made from a card kit I got from Express the Moment ( I LOVE THEIR KITS!!) I loved the paper in this kit; the colors are bright and fun but also non gender specific, so these cards can be for a girl or boy!


And one more card (just not for the challenges) that comes from the same kit. Just for fun!

Saturday, October 1, 2011

Golden Anniversary

It's been awhile since I made something fun and got to enter it in a challenge so here is an anniversary card I made for a special order. I love these colors, dark autumn colors are my absolute favorite! I was really happy with how it turned out and my customer adored it!


Friday, September 23, 2011

Buttons & Pumpkins

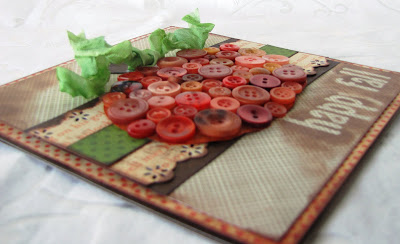
It's Week 2 of our current Beary Sweet Challenge, "Happy Fall Y'All" and the DT challenge this week was to add buttons to our Happy Fall projects. I decided I wouldn't add just a button or two, but a whole barrel full!


Or at least an entire pumpkin full! The center of my card is a pumpkin made from buttons.


To start with I found a pumpkin pattern, (you can get your own copy by clicking here), traced it onto Bo Bunny Double Dot Burnt Orange cardstock and cut it out. Then I used Tacky Glue and adhered all shades and sizes of orange buttons to my pumpkin. This is a little tricky and I found it worked the best to just put glue on a small area, find buttons to fit and then move on to the next area, adjusting as I went. Once my pumpkin was dry I could then mount it to my card.


For my card I used some of the awesome new papers from Authentique's Glowing line. I love all their 6 x 6 paper pads, make sure to check out these new arrivals in the Beary Scrap store. I made my sentiment by applying letter stickers, inking over the top with an ink dauber and then removing the stickers.


I hope the beautiful fall colors and weather find you wherever you are and continue to inspire you to create this weekend. Happy crafting!

Friday, September 16, 2011

Happy Fall Y'All!

Well, it's Friday and it's also time for a brand new Beary Sweet Challenge! Our new theme is Happy Fall Y'All and I'd have to say, this is a piece of cake for me because I LOVE FALL. I love the cooler temperatures and the crisp scent in the air. I love harvest time (and I do live on a farm! :)), back to school, football and the beautiful fall colors! I chose to focus on some of those colors for my card this week:


I saw this idea for a strip of circles on a card here and was so excited to try it! What a simple, classic and cute idea. So here is how I did it:

1. Cut a strip of paper 3 inches wide by 5 7/8 inches long (so it will fit on a 6 inch card base).


2. Punch 16 circles from coordinating paper and ink all the edges. I used a 1 1/4 inch circle punch and the beautiful papers from Scenic Route's Sonoma line-- these are so perfect for fall, love them!


3. Begin glueing the circles onto the cardstock strip, starting at the bottom and overhanging the edges and overlapping the circles as you move up. I laid all the circles out on the cardstock without glue first to get the feel of where they should go.


4. Continue until you have used all 16 circles, the top ones will hang over the edge quite a way, that is fine!

5. Turn the whole thing over and trim the edges of the overhanging circles so they are even with the cardstock strip. Then ink around the edges of the whole piece.

.
There you are! The strip of circles is finished and ready to adhere to a card. I zigzagged stitched mine to another piece of cardstock 5 7/8 x 5 7/8 and then attached that to my 6 inch card. My word is a custom made vinyl applique that was actually for another project but has just been sitting around my work table and fit here perfect!

I can't wait to see your Fall creations, make sure to enter them in our new challenge for your chance to win!

Friday, September 9, 2011

Trucks are not Girly, Right?

Happy Friday everyone! At The Beary Scrap this week, we are using our current sketch and trying to make anything that is "not girly." Here is my attempt at something "not girly"-- I love to put flowers, bling, ribbon and lace on everything and so it was hard to come up with something not girly. But I think my masculine birthday card based on our current sketch came out pretty well-


While trying to decide what to do I had a sudden flash of this green pickup that I had seen on the Country Drive from Echo Park stickers and knew that would be the focus of my card. There are a lot of colors in this paper line but I stuck with just red, green and blue for my boy colors.

I popped up my pickup truck with some foam squares and then filled up the back with "Happy Birthday" strips. I couldn't resist putting just a little Stickles glitter glue on it for some detail and a few green hearts off the same sticker page as the pickup. (Hearts can be on a guy card, right?)


Have a great weekend and be sure to enter our sketch challenge for your chance to win!

Friday, September 2, 2011

Brothers

We have a brand new sketch to play with over at The Beary Scrap this week:


My project using the sketch is as 12 x 12 layout using these great Windsor papers from SEI. I thought the colors perfectly complemented the sepia pictures of my boys together.


I wanted to include many of the beautiful patterns from this paper line and so I pieced together the background of my layout instead of using just one large paper. I left off the flowers in the top left hand corner as this is a boyish layout (although I do think these papers are not what you would call traditional "boy" papers-- just goes to show you can use anything!). So instead of the flowers, I used a chipboard flourish that I first inked and then spritzed with Glimmer Mist. I really love how the whole thing came together and I will definitely be using these papers again! (I'm thinking beautiful for fall wedding cards!)

I can't wait to see what you make with the sketch so get those entries coming, check out all the details of our challenge here!